
A nautical chart is not a picture of the coast. It is a working document, closer to a tide table than to a road map: every number on it answers a question you will ask sooner or later — how deep, how far, which side, how much water under the keel at half tide. Newcomers tend to read charts the way they read a phone map: find the harbour, trace a line, go. That works until the first foggy morning or the first rock that isn't where you expected it. Reading a chart slowly, symbol by symbol, is the cheapest piece of safety equipment you will ever own.
First, Look at the Corners
The attractive part of a chart is the water. Start somewhere else. The title block tells you which chart you are holding, its edition number and date, the scale, and the units used for soundings. A 1:50,000 coastal sheet shows a whole bay and the offshore passage; a 1:5,000 harbour plan shows individual mooring buoys and the edge of the quay. Both are useful, and they answer different questions.
The edition date deserves a second look. A chart printed several years ago will not show a new breakwater, a moved buoy or a dredged channel that has since silted up. Check the chart against the latest Notices to Mariners, or ask at the harbour office whether anything has changed locally. Fishermen and harbourmasters know things no chart does.
Nearby you will find the vertical datum notes. Soundings are measured from chart datum, which is normally close to the lowest tide that can reasonably be expected, so the charted number is roughly the depth you get at low water. Heights of landmarks, bridge clearances and light elevations are usually referenced to mean high water or mean high water springs, which is why a bridge that looks generous on paper can feel tight on a big spring tide. Read those notes once and the rest of the chart makes sense.
Soundings, Contours, and What "Deep Enough" Means
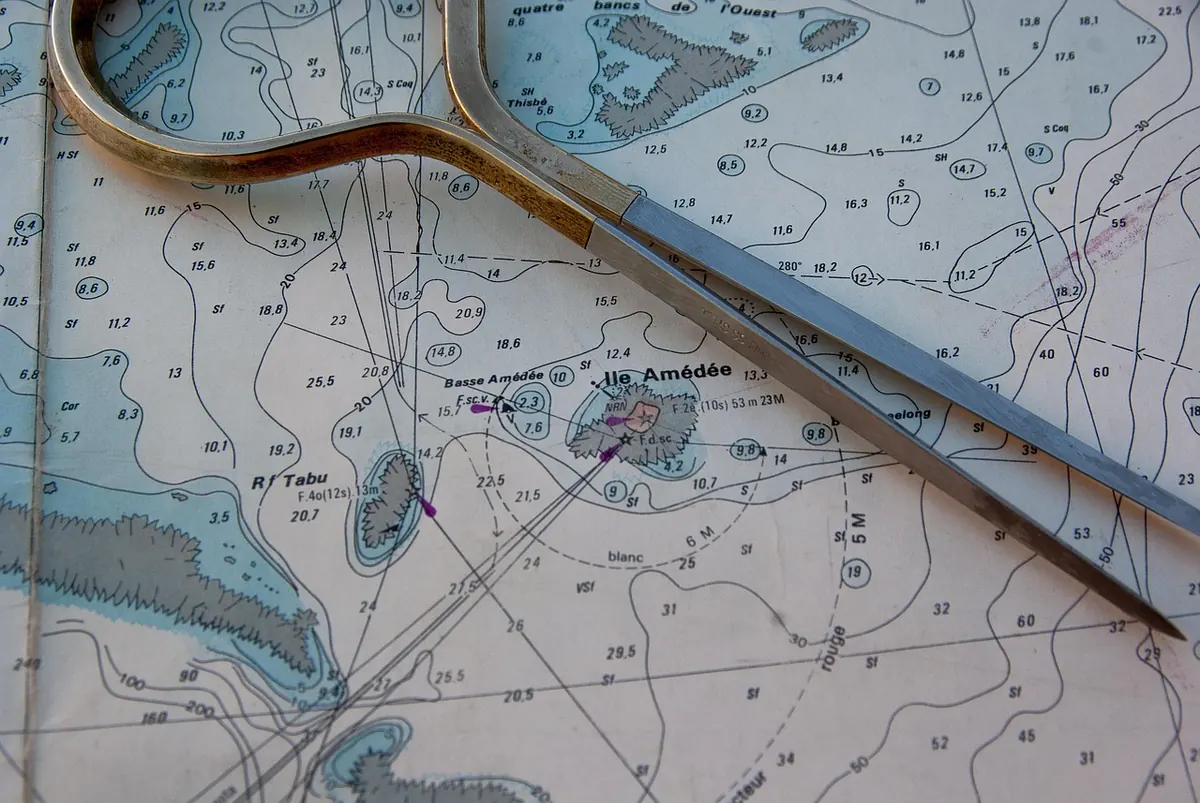
Those small numbers scattered across the water are depths in metres below chart datum. A sounding of 4.6 means four metres and six tenths of water at chart datum; add the height of tide to know what you actually have. If your boat draws 1.8 m and the tide is 2.5 m, then in theory you have 4.3 m over that spot — comfortable. In practice, allow a margin. Soundings are sampled, not continuous, and the seabed between two numbers is a guess made by a surveyor decades ago.
Drying heights are marked differently, often with a line beneath the figure. A drying height of 0.8 means the rock or bank stands 0.8 m above chart datum and will be out of the water near low tide. Pay attention to these in anchorages and shallow estuaries.
Depth contours do more work than individual numbers. The 2 m, 5 m, 10 m and 20 m lines divide the chart into bands, and shallow water is usually tinted blue. If your boat draws 1.8 m, the 5 m contour is a useful offshore companion: follow it and you are unlikely to touch. What the contour cannot tell you is what lies between it and the next one. Treat the space between contours as unknown ground and keep the boat on the deep side of the line.
Buoys, Lights, and the Symbols You'll Use Most
Buoyage follows the IALA system, and the first thing to establish is which region your chart covers. In Region A — most of Europe, Africa, Asia and Australia — red marks are left to port when entering a harbour from seaward. In Region B — the Americas, Japan, the Philippines and Korea — the colours are reversed. Get this wrong once on a foreign charter and you will remember it forever.
Cardinal marks are worth memorising, because they tell you which side of a danger the safe water lies on:
- North: two cones pointing up, black above yellow.
- South: two cones pointing down, yellow above black.
- East: two cones base to base, like an egg, black-yellow-black.
- West: two cones point to point, like a wine glass, yellow-black-yellow.
Light descriptions pack a lot into a few characters. Something like Fl(3) R 10s 12m 8M reads as: three red flashes, repeating every ten seconds, with the light 12 metres above high water and visible for 8 miles in clear weather. Fl is flashing, Oc occulting, Iso isophase, Q quick. Group flashes matter more than they seem — at night, counting flashes is how you confirm which light you are looking at.
Other marks you will meet often: safe water marks (red and white vertical stripes, often a single red sphere), isolated danger marks (black and red with two black spheres), and special marks in yellow for cables, racing marks and area boundaries. The chart's own legend, printed on the sheet or in the accompanying booklet, is the final authority when a symbol puzzles you.
Hazards Hidden in Plain Sight
Not all danger is drawn as a rock. Look for:
- Wrecks, either dangerous (a symbol with a mast or hatched outline) or swept to a stated depth.
- Foul ground, where anchoring will cost you an anchor.
- Overfalls, tide rips and eddies — often marked with small arrows and a note about strength.
- Submarine cables and pipelines, usually a dashed line with a warning against anchoring.
- Areas to avoid: firing ranges, fish farms, nature reserves, traffic separation schemes.
Magenta ink is used for overprinted information, and it is nearly always worth reading: cautionary notes, restricted areas, and the figures printed under bridges and cables giving vertical clearance. A clearance shown at a defined tide level is not a promise for the day you arrive, especially with a low pressure system pushing water levels up.
A Simple Plotting Routine for Coastal Passages
Once the symbols are familiar, a short routine keeps the planning honest. Work in pencil, lightly, and keep a note of what you decided and why.
- Mark your starting position and the intended destination. Note the time of departure and the expected speed.
- Draw the intended track as a single straight line where possible. Fewer turns means fewer chances to drift onto a shallow bank.
- Walk along the line with your eye and pick out every hazard within a sensible corridor either side — say half a mile in open water, a hundred metres in a narrow channel.
- Choose a safety contour and decide which side of it you will stay on. Write the contour number on the chart.
- Set a clearing bearing or danger bearing for the tightest point: a bearing beyond which you know you are drifting toward trouble.
- Check the tide for the whole passage, not just the start. Depth, current direction and the height of a sill or bar all change hour by hour.
- Measure the distance of each leg, work out the time at your cruising speed, and add a note of where you would turn back if the weather or visibility turns.
- Write a short passage plan — legs, waypoints, courses, distances, times, hazards — and leave it where anyone on board can read it.
On the water, plot your position at fixed intervals rather than only when you feel unsure. A small cross every twenty minutes tells you about the current before it becomes a problem.
Five Minutes at the Chart Table Before You Cast Off
Before you start the engine, give the chart one last, quiet look. Confirm the chart covers the whole passage, including the bit where you might have to divert. Check the edition date and any corrections. Find the nearest safe anchorage to your track. Read the notes in the corners and the magenta warnings one more time. Then fold the chart so the relevant area sits on top, and keep a pencil and a pair of dividers within reach.
Charts reward patience. The more often you read one at the table in harbour, the faster the symbols become sentences — and the more confident you will be when the visibility closes in and the only thing you have is a sheet of paper telling you exactly where the deep water is.
Photo: jackmac34 / Pixabay